
What's so special about the X-Box?
X-Box FAQ Frequently Asked Questions
Flashing the TSOP of your Xbox Tutorial
X-Box UXE Softmod Installation tutorial
Flash the Firmware of your Xbox 360
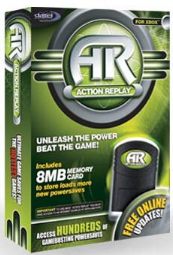
| This is what the Action Replay box looks like, it sells for around $40 and comes with its own 8Mb Memory card but you should use a genuine Microsoft Memory card to avoid problems it comes with a USB Memory writer. |
 |
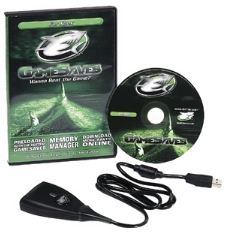
This is what the contents of the Gameshark box look like, it sells for around $30 and comes with no Memory card. You should use a genuine Microsoft Memory card to avoid problems. it comes with a USB Memory writer. |
 |
Both USB Memory Writers will work fine as the writers are actually just USB cables with a connection to the Memory card. No electronics are used in the writers, so both work with the Action Replay software which is what we will be using to write our save games to the Memory Card (note other Memory cards may work but the Microsoft memory card is 100% compatible).
First you need to prepare your Bios using the steps outlined below
Using XBtool
- If you have a V1.0/1.1 XBOX Console you need a 1 MB (1024 KB) BIOS.
- If you have a V1.2/1.3/1.4/1.5 XBOX Console you need a 256 KB BIOS.
The BIOS I highly recommend is X-ecuter 2 4981 BIOS. (4981.06_256k.bin). I am going use the X-Ecuter 2 4981 BIOS for this example because it is the BEST BIOS and is MULTI which works for ALL VERSIONS of XBOX.
Once you have obtained the X-Ecuter 2 4981 BIOS (It’s 256 KB when you download it, don’t worry just follow along) open up XBTOOL. Here is a picture of XBTOOL, I will explain what everything is and what to do.
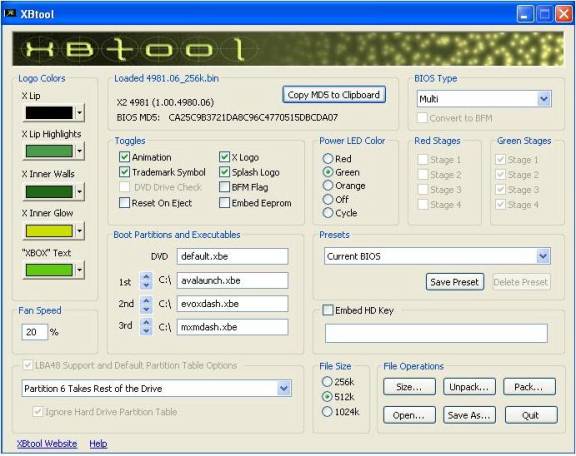
Click 'Open' Then locate your 4981.06_256k.bin.
LOGO COLORS: These are the colors you get on the opening splash screen. Look at the photos below as an example.
One is the real Microsoft Dashboard. Can you tell the difference?
LOADED BIOS: (Located right beside logo colors) this is just simply what BIOS you have loaded into XBTOOL being X-Ecuter 2 4981 in this case.
BIOS TYPE: This just means what versions this BIOS is compatible on. In this case all XBOX Versions, being MULTI.
TOGGLES: Just the stuff that goes on when booting the XBOX. I would just leave these how is.
POWER LED COLOR: Which color you want your Power / Eject button to be when this BIOS is loaded. You can choose any color, the Stages beside it just ignore, it goes with which color you choose.
FAN SPEED: What speed your fan goes at. Just put it anywhere between 20% and 25%
BOOT PARTITIONS AND EXECUTABLES: Leave DVD how is, this is just what the BIOS will look for to boot 1 st. Example is when you just flashed and boot your XBOX with the BIOS, it will load the Microsoft Dashboard. But after say when you put Avalaunch or Evolution-X on it, it will load that BEFORE the Microsoft Dashboard. Pretty simple stuff. Change that to your convenience.
PRESETS: Ignore this.
EMBED HD KEY: Leave it unchecked and ignore it.
LBA SUPPORT: Ignore it, we don’t need it.
FILE SIZE: OK, once you have configured your BIOS on how you like it, choose your correct file size. If you have an Xbox Version 1.0 or 1.1 check the 1024 KB BIOS. If you have an Xbox Version 1.2/1.3/1.4/1.5, then check 256 KB BIOS. Then click Save as, and save it as bios.bin
Now once that’s done, put your bios.bin in the proper 007 AUF game save directory. Technically it needs to be placed into 2 different places the first bios.bin should be placed into the "bios" directory which is located under the "4541000d\000000000000\" directory. a .txt file should be here that says "bios goes in here for evox flash.txt" the second copy goes where the .txt file "bios.bin for eurasia goes here.txt" is located.
How to get the save game onto our Memory card!
So if you don't have the software you can download the Action Replay software Here after installing it you only need to zip your save game with winzip or Winrar remember to zip the file from the Udata folder and include its directory contents below the Udata folder. Once you have your '.zip' simply drag the file from the File Explorer window onto the left most pane (which is the contents of the Memory card).
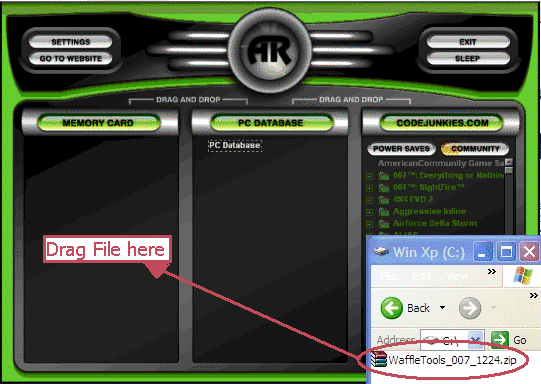
Note in the photo above the large 'AR' is black, it will turn green once a Memory card is inserted and recognized by the Action Replay driver. The bar on the Memory Card will turn orange and increase in length until the complete file has been written to the Memory card. The Memory Card screen will be updated with the save games installed on the Memory card. Now you're ready to copy the save game to your Xbox.
Copy the save game to the unmodded XBOX that you are about to flash. Make sure you have copied it the hard-drive and do not try loading the save game from the memory card as it will fail and may result in a bad flash which means your not gonna be playing any games without some major soldering.
I had never used a memory card before and couldn't get the copy option to show up until I figured out you need to select the game title first then press the D-pad to the right to enter the folder, now the copy option shows up.