
History behind the biline.ca website
Have a laugh read the Humour Pages
Read about the IBM 4100 Web-printer
Customer Service where has it gone?
The Kitchen Renovation
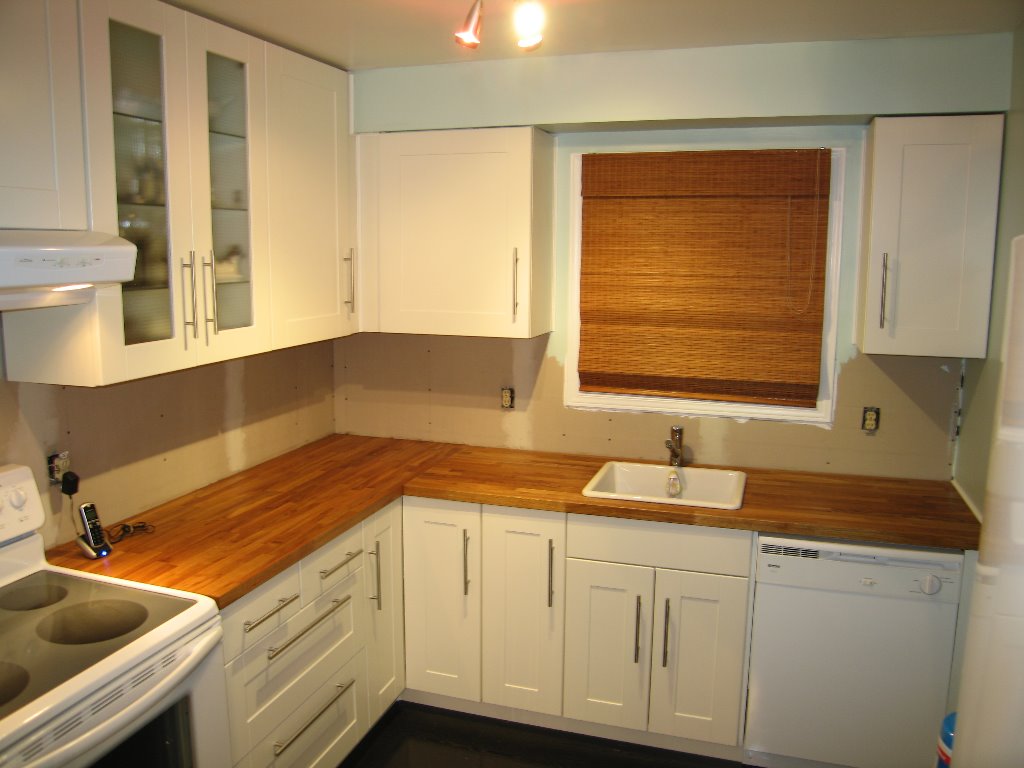 |
We had done a previous kitchen renovation that was around the same size as this kitchen but elected to have it completely installed and it cost us $10,000. We were looking to reduce the cost by doing it ourselves, we choose Ikea over other possible solutions for the main reason of Formaldehyde emissions. Although not specifically mentioned as 'E1' or 'E0' Ikea has applied the German formaldehyde requirement (which is currently the strictest) for all IKEA products. The German limit is such that even persons who are over sensitive to formaldehyde should not experience any problems. |
 |
Remember that vent in the middle of the floor, well I moved it under the cabinet near the fridge (which is where the old dishwasher was) located). I wanted to use a wood vent so I purchased two Oak wood vents that were 3" x 10" and I shaved a bit off the top and bottom to get them the same size as the kick plates. I then used some plastic and created a hood that would direct the hot air directly through the wood vents on the kick plate. I sealed all the joints with Foil tape (metal foil with an acrylic adhesive) which is really sticky and designed for this type of situation. |
 |
The entire kitchen plus this wall of cabinets (see photo) cost us $4,385.71. This amount includes the butcher block oak countertops, sink, facet, all hardware, handles, drawers, soft door closer's and all trim work including kick plates. Design was done by my wife using the Ikea kitchen planner and verified by Ikea staff which were very helpful. The only small hitch was that some parts were not available at the time and would be delivered later. I strongly urge you to pay the delivery charge as once you see the amount of boxes and the amount of trips you'll probably have to make to get everything it will be worth every penny. |
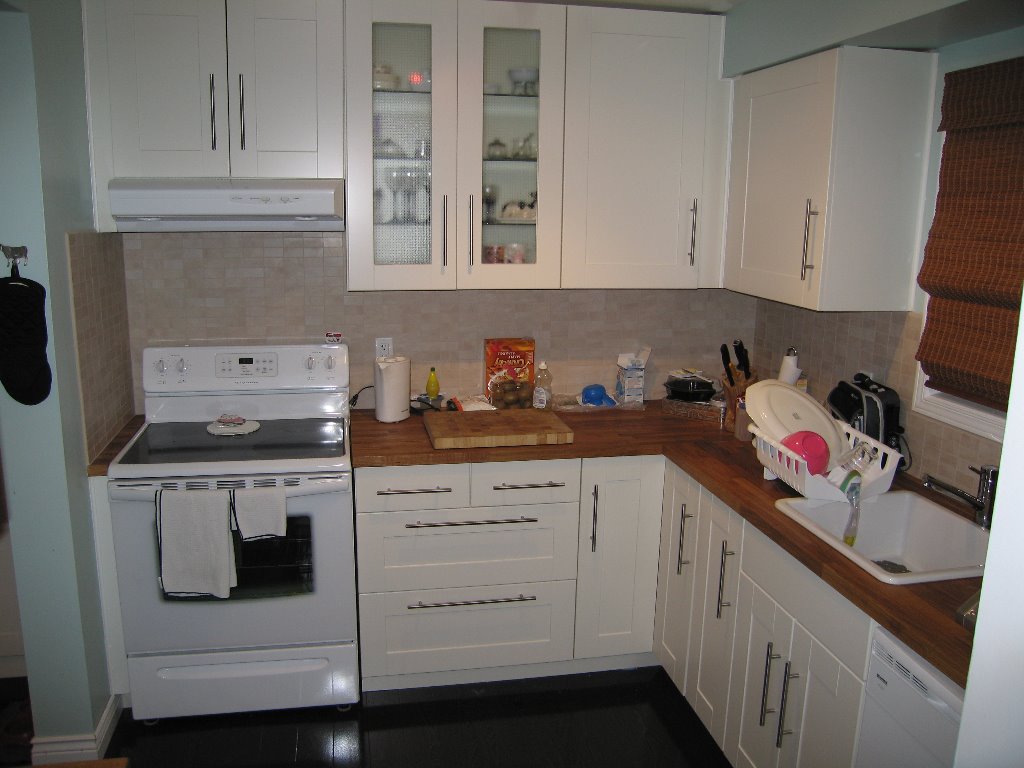 |
Ikea 'flat' packs everything so one minor quibble is having to assemble all of the cabinets before you can start. Once you have a few made you get the hang of it and they go together really quick. Installation was made very simple as you install a mounting rail for the 'upper' cabinets and they hang from this rail. They can be repositioned and adjusted up or down as needed with ease until you tighten the mounting bolts completely. The 'lower' cabinets use a simple set of adjustable legs (you see them in the photo above about the vent) to set the height. Once everything is good you simply drill a hole through to the other cabinet and install the included special screws and tighten. |
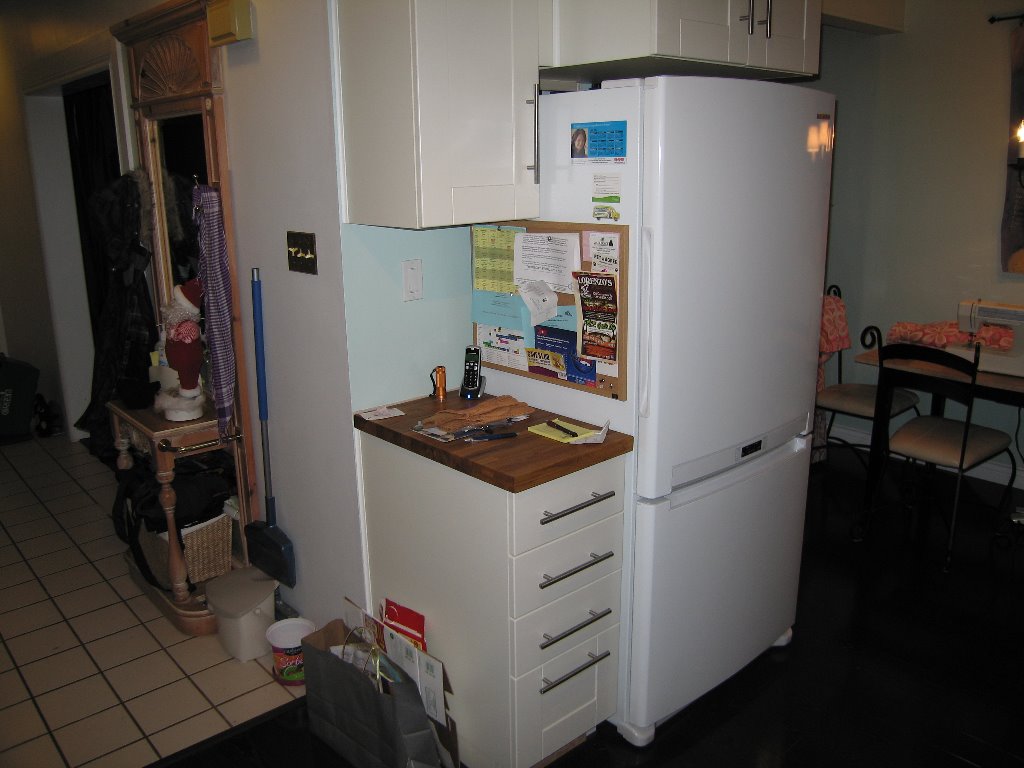 |
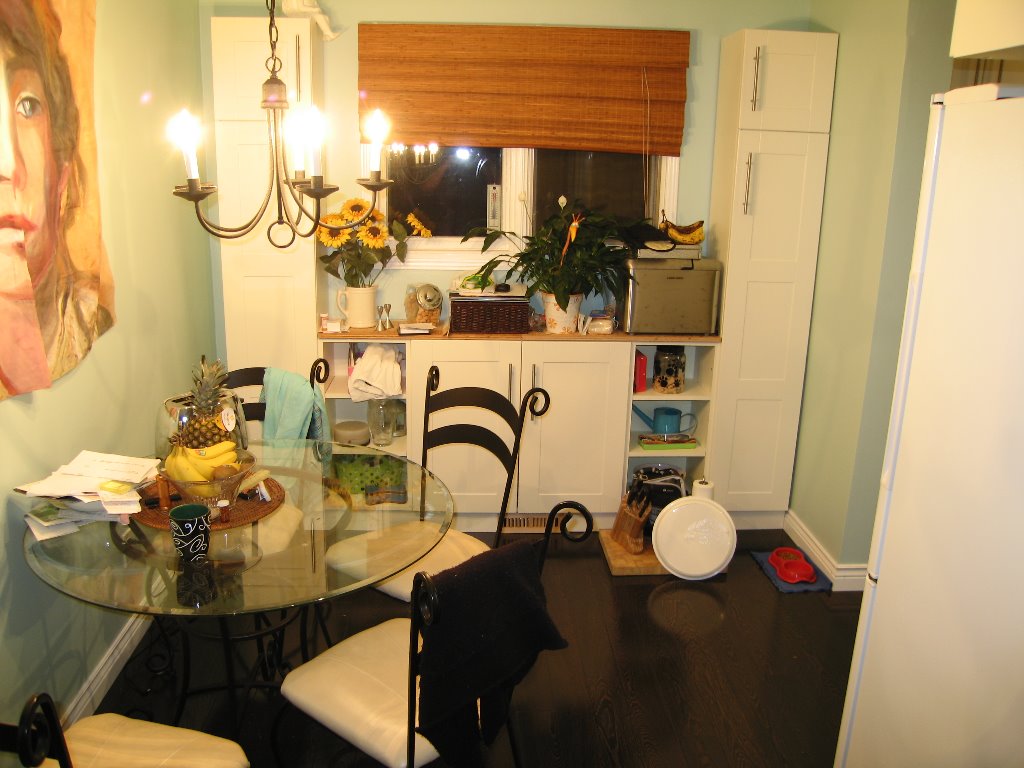
We removed the wall between the living room and the kitchen but had to leave a small part of it due to wires and ductwork. Instead of drywall I used pine boards to create the header where the wall was removed, this reduced the sanding and filling needed to get a nice corner on the header. You'll also notice this wall is where we decided to place the fridge along with a small set of drawers and upper cabinets. Originally the plan called for sides that connect to the cabinet sitting over the fridge and it fits inside, well turns out the Samsung fridge we ordered was wider than the opening. |
 |
Turns out fridges don't really have a standard so get all the measurements down before you start planning. We managed to fix the problem by bolting the extended portion to a bulkhead we happened to have running just above the cabinet. For the floor we choose a product with an 'E0' rating (has effectively zero Formaldehyde emissions) we choose a floor with a beveled edge and a high gloss finish. My wife wanted contrast between the white cupboards so we went for a dark chocolate color, it really looks like a hard-wood floor when installed |
Here is the breakdown of the expenses required to complete the house to this point.
Cost |
Description |
Purchased From: |
$32.99 |
Mop, gloves |
Canadian Tire |
$339.52 |
Closets Organizers, Outside plastic chest, VPX cordless screwdriver |
Canadian Tire |
$348.72 |
Paint, Rotozip, Tarp, Hose nozzles |
Rona |
$249.23 |
Garden Hose, Tiles for basement washroom, Paint living room |
Rona |
$315.54 |
Gravel, Cement, Front and side Door Locks, Wall Compound |
Home Depot |
$190.42 |
Smoke Alarms, Paint Tray+Liners, CO Alarm, Brackets + garden tools |
Wal-Mart |
$85.78 |
Ground-Spike (Dryer), BBQ Tools, Washers |
Canadian Tire |
$55.93 |
Spruce 2x3's, Spiral nails 2", 2 Plastic totes (garbage use) |
Home Depot |
$19.48 |
Flowers and Top soil |
Canadian Tire |
$85.01 |
2 16x25x1 Furnace Air filters, BBQ Brush |
Canadian Tire |
$106.39 |
Wrecking bars, Garden Spade, Gravel |
Home Depot |
$67.74 |
Shower Curtain, Duvet cover, Dish rack |
Ikea |
$62.13 |
Mirror, Carpet runner |
Ikea |
$100.27 |
Lights, Clear Latch Boxes |
Wal-Mart |
$78.72 |
Stretch Wrap, Plastic Shelving |
Costco |
$107.12 |
17' Moving Van |
U-Haul |
$263.77 |
Metal Vent dryer pipes, Light Laundry Room, 10M 14x2 Wire |
Home Depot |
$54.06 |
6M 8x3 Wire Stove, Box + Plug |
Home Depot |
$18.58 |
ABS 90Degree Elbows, Putty Weld, ABS Glue |
Home Depot |
$98.94 |
IR Extenders, Cable vision wire 50Feet |
Wal-Mart |
$13.54 |
2 Ball valves for Kitchen Sink |
Home Depot |
$1,388.15 |
Electrical Panel Upgrade (Move Dryer Plug and relocate Stove Plug) |
Newell Electric |
$120.33 |
VPX Battery, Toaster Oven |
Canadian Tire |
$165.89 |
LCD TV Wall Mount, Marrettes |
Home Depot |
$99.00 |
Furnace Cleaning |
Gus 'N' Air |
$1,805.74 |
Fridge and Stove |
Leon's Furniture |
$3,700.00 |
Ikea Kitchen |
IKea |
$198.80 |
Roller blinds (Master,second bed room) Curtains and rod for Living Room |
IKea |
$719.25 |
Alarm system |
Alliance Security |
$236.04 |
1/2" EasyBoard (10 sheets) |
Home Depot |
$137.63 |
2 Sheets 4'X8' 1/2" Plywood, Screws, 2 wood Floor Registers |
Home Depot |
$409.06 |
15" Cupboard change for Fridge area |
IKea |
$558.85 |
Pink Foam 1.5", Lawnmower, Glue ,Decora Light switch pack + Covers |
Home Depot |
$321.77 |
Basement Window |
Home Depot |
$99.84 |
Paneling, Nails, Glue, Pine Strip , pine shelf |
Home Depot |
$34.31 |
Primer for oil (Closet in hall) |
Benjamin Moore |
$48.46 |
Garbage pail, Molding, Stretch cable hooks |
Home Depot |
$62.25 |
Moldings (staircase), Screws 21/2" and 31/2" |
Home Depot |
$266.75 |
Kitchen Panels,2 shelves pine |
IKea |
$44.62 |
Paint, Lights for hallway,Paint for front door |
Rona |
$164.35 |
Ceiling fan, Plumbing parts for dishwasher install, Saw blades for jigsaw |
Home Depot |
$238.80 |
Hood fan for stove |
Home Depot |
$117.02 |
Lights for basement with compact florescent bulbs (5) |
Home Depot |
$36.02 |
Earth and Mulch |
Ritchie seed and feed |
$467.53 |
Tiles for Back-splash, paint for bedroom, Tile cutter saw |
Rona |
$98.65 |
Glue for tiles, Molding, stain, |
Home Depot |
$112.05 |
light bulbs, stacking shelves,toilet seat |
Wal-Mart |
$78.35 |
Flowers, gravel for front, molding for around dishwasher |
Home Depot |
$167.22 |
Toxbox Air filter for furnace |
Home Depot |
$695.35 |
Laminate Floor + padding + 5" duct +Carpets for Hallway |
Rona |
$649.04 |
Laminate Floor + padding (Basement) + Blinds Kitchen |
Rona |
$1,495.26 |
Laminate Floor Kitchen + Moldings |
Home Depot |
| 255.45 | Paint for Hallway and third bedroom | Home Depot |
$17,691 |
Total Spent so far (total includes all tax) |
If the list seems over detailed, it's only to show all those small hidden items that we forget about when planning a renovation. Renovations always cost more than predicted no matter how well you think you planned for them simply because it's almost impossible to account for things like screws, nails, drywall compounds, and adhesives. Don't forget the extra expenses as you find out that you can't reuse some items or they simply break upon removal or reveal an underlying issue that needs to be fixed.
We still have the entrance hall tiles to tackle (it's pretty ugly), we also want to change the aluminum siding and add a window on the upper stair landing. The backyard needs some minor work and we will need to construct a new shed eventually (the base is pretty rotted) Windows are fine for now but we plan on changing them along with the front and side doors. Hopefully the $2,300 left will cover all of it but I suspect we will run a little over budget, I'll be updating this page whenever the work gets done.
Some other tips on reducing VOC's and other possible allergens.
I hate drywall dust and sanding because not only is it messy but the dust seems to get into everything in the house. To avoid sanding I try to make all patch's as smooth as possible and I work in thin layers with 'LePage Poly Instafil Lightweight Spackling Compound' it dries very fast, applies thick when needed and does not shrink. Once you get the hang of it you'll be amazed to how well it works, mind you not suggested for large sections but patch repairs work great. When used in conjunction with Easyboard for patching it works great because the Easyboard is just a bit thinner than the drywall allowing you to match the edges with the spackling compound.
Formaldehyde can be removed from the household, many common cold symptoms can be traced back to formaldehyde in the furniture, cupboards and flooring. Look for 'E1' or 'E0' products and remember Ikea offers 'E1' across all of it's products (not just the kitchen cupboards). Ikea also offers many healthy choices when it comes to plastic such as those used in shower curtains because it adheres to the european standards. Have a look at this list of common symptoms Here. Also products that have formaldehyde can 'off gas' for many years after they are installed.
Kitchen renovations can be done fairly easily by almost any general handyman using Ikea's system or those offered at your local construction depot, just keep in mind a plumber may be needed to disconnect and re-attach your fixtures.
Paint has come a long way and CIL Naturaliving is a NO VOC paint. I have used the CIL and it hardly smells, the smell kinda reminds me of 'wet mud'. The only problem is that when choosing deep colors the colorants can introduce VOC's so be careful if you really want NO VOC's.
Use pine shelves wherever possible instead of MDF (Medium Density Fibre board) or Particle boards with a veneer.
Adhesives are still a big problem but some have much less VOC's than others and many manufacturers are producing water based products that have little or no VOC's. Just remember to read the instructions as some require a 'set-up' time before using.
Toxbox Air filters are a safe, easy and inexpensive way to filter the air in your home. There are all kinds of particles floating around in our air such as viruses, bacteria, dust, dander and pollen, as well as airborne chemicals like formaldehyde and benzene can all be harmful to our health. We know that 95-98% of indoor air is made up of particles smaller than one micron. Most air filters say they are "95% efficient at 1micron" great except this really means they are collecting less than 2% of the harmful airborne particulates. Toxbox is designed for particles in the 0.007 to 1 micron level, where it matters most to your health. If you have any types of allergies I can't recommend it enough.
If you haven't check the detail spreadsheet yet then have a look as the vendors for the products mentioned are all on the sheet and why hunt for a place that sells something when it's all there!