
Securing the Internet and your Computer
Monsoon's 2.1 PC Speakers Review
Acer 2200/2203LCi Laptop Review
Zalman Theatre 5.1 Headphone Review
Creative Zen Micro MP3 player Review
Samsung's CLP300 Colour Laser printer Review
Canon 8400F Photo Scanner Review
Canon Selphy CP510 Photo Printer Review
Windows Vista x86 and x64 versions should we upgrade?
SilverStone GD01MX HTPC Case Review
Corsair Survivor GT 8GB USB Flash Drive Review
Mio P550 Digiwalker
GPS PDA Review
Recode DVD's to H.264 with AAC 5.1
Guide to Install OS X 'Leopard' on a PC
Guide to install OS X 'Snow Leopard' PC
AVerTV Hybrid Volar MAX Review
'FARE' Level 3 and settings to use with it.
Before I start into this section I should mention that scanning a negative provides a superior scan than any print can, regardless of size. The negative that was used to create the print is the original, and contains much more color and detail information than the print can, slides are the best source to use if available. In the examples below the first scan is from the photo the second is from the 35mm Negative and the last is the same negative with FARE options turned on.
Click photo to enlarge  Scan from print |
Click photo to enlarge  Scan from 35mm negative |
Click photo to enlarge  Scan from negative with FARE |
Click photo to enlarge  The amount of detail and colors are pretty good from a print! |
Click photo to enlarge  The colors appear darker overall but the image is sharper and the colors are more defined |
Click photo to enlarge  The image is clearly the best for color detail and the hairs and scratches have been removed |
The differences are more obvious when viewed at the actual scanned resolution of 2400dpi and in this case the print and negative are very recent so fading isn't an issue, what about a slide from 1961? We'll get to that in a moment, right now I want to talk about software settings that should be used as the simple interface really doesn't give you any, I will mention that the simple interface generally produces fine scans and applies the default FARE setting to the scans so they look fine. My issue is that when you use the simple interface the highest dpi you can scan at is a measly 600dpi, we didn't purchase a 3200 dpi scanner to scan at 600dpi!
If you use CanoScan Toolbox you'll need to set the option to 'Display the Scanner Driver' if you use the TWAIN acquire command from a program you should see the Scanner Driver by default.
 |
Just place a check in front of the 'Display the Scanner Driver' option, you'll find this option in the window that opens when you either press the scan button on the 8400F scanner or by opening the CanoScan Toolbox and clicking the scan button on the toolbar. |
The Scanner Driver by default opens with the 'Simple Mode' Interface so click on the tab labeled 'Advanced Mode' which allows us to have complete control over what is going to happen when a scan is performed. I played with many of the options and found some to have no noticeable change on the finished scan while other options had a significant effect. While scanning slides from 1961 I used the settings as seen in the photo below.
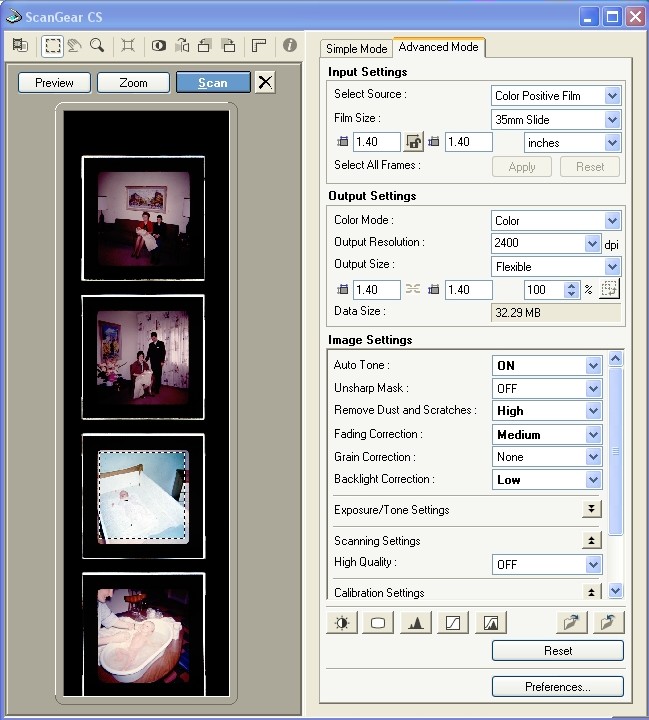
The Input and Output settings are straight forward so no need to discuss these but the Image settings section contains many options, I suggest the following settings for these options:
- Auto Tone = ON - It seems to do a good job of keeping flesh tones the right color
- Unsharp Mask = OFF - I didn't see any change with this option turned on or off (funny as this option is supposed to sharpen the image)
- Remove Dust and Scratches = HIGH I noticed the best performance when the highest setting was used it will take longer to scan the image but worth the wait.
- Fading Correction = Medium - I found that using medium with Backlight Correction set to low gave me the best colors
- Grain Correction = OFF - Truthfully I don't know if this will help with negatives but with slides it does nothing.
- Backlight Correction = LOW - When used with Fading Correction set to medium this option gave me the best colors
The rest of the settings can be tweaked and it's up to you to decide if they are worth playing with. I will mention that any of the FARE processing options such as the 'Remove Dust and Scratches' will take much longer around 3-5 minutes versus 30 seconds for a normal scan to complete. The extra time is partly due to the second Infa-red scan and the needed processing time to complete the 'Remove Dust and Scratches' command.
So after tweaking all these settings what improvement can I expect from FARE?
Here are some slides from 1961 that I scanned with no FARE options enabled and directly below is the same scan with the FARE options enabled and set as described from above.
Click photo to enlarge 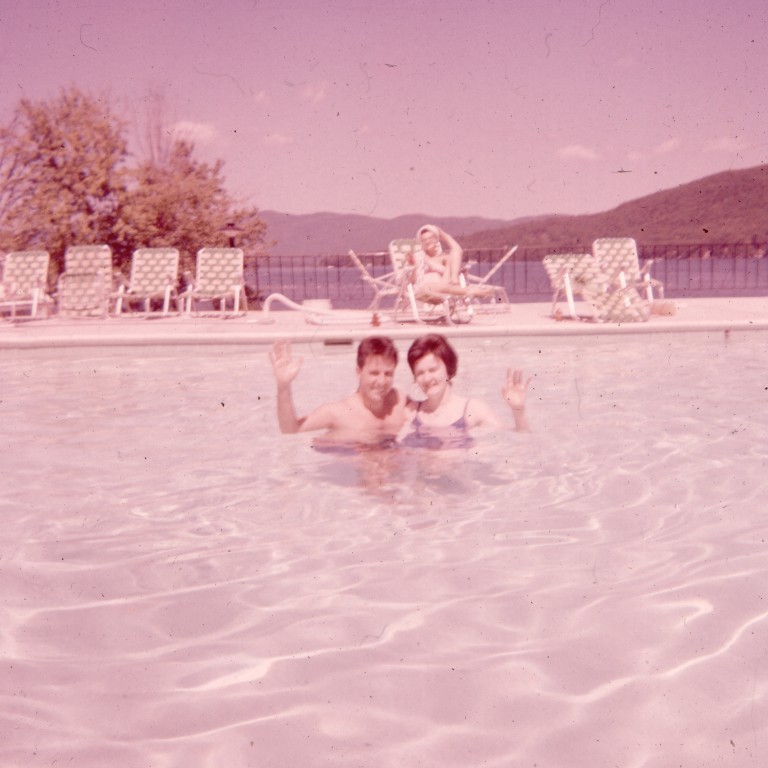 |
Click photo to enlarge 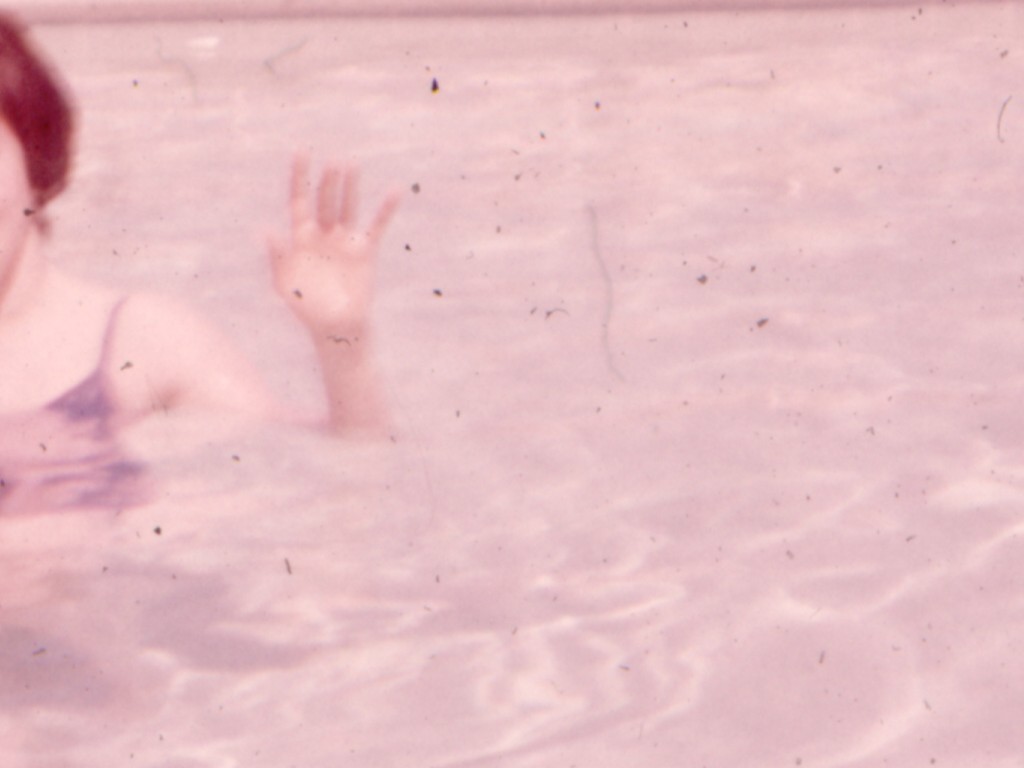 |
|
 Click photo to enlarge |
 Click photo to enlarge |
If you inspect the close-up on the right side of the main image (1:1) you can see where the Dust and Scratches have been removed, obviously some traces are left but they are not distracting to the over-all image. FARE does a decent job of restoring the faded colors and the Dust and Scratches have been considerably removed. Here is another sample taken on a slightly overcast day
Click photo to enlarge 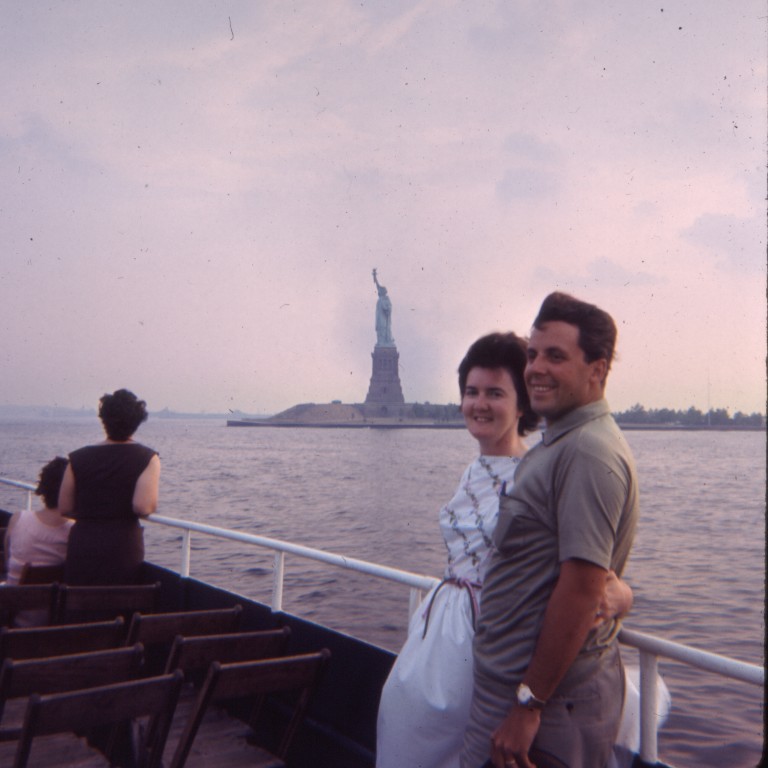 |
Click photo to enlarge  |
|
 Click photo to enlarge |
 Click photo to enlarge |
Now I'm not a scanning professional and I barely know how to use Adobe Photoshop so those who are thinking I can do a better job in Photoshop probably can, for the rest of us we have FARE. Canon's FARE technology in most cases delivers as promised, and for the those of you looking for powerfull Photoshop like options in a simple to use program check out Thumbs Plus 7 it sells for $50 (US).
The Canon 8400F does have some issues.....
- The buttons on the front of the scanner seem to work only after pressing them twice or holding them down until you see your scanning application start, this may have been by design to avoid accidental scans when the button is pressed in error but in practice this is annoying enough to avoid the buttons entirely.
- The cable that connects the 'Lid' of the scanner to the 'Base' has fallen out a few times on me and when this occurs I lose the option to scan slides or negatives. Only after turning off the scanner and rebooting the PC did the menu option return.
- Rubber feet, why didn't Canon add those little rubber feet to the front of the scanner? The front of the scanner was forever sliding around on the desk until I added some rubber feet to the front of the scanner.
These are fairly minor quibbles but they are a nuisance that Canon should have noticed and corrected.
I have used various scanners and I admit for the most part this scanner doesn't really offer any compelling reason to upgrade or spend more than a lower priced Canon model. But if you intend to scan slides or negatives this scanner provides results comparable to much more expensive dedicated film scanners and the scanner delivers on it's promise of 48-bit, 3200dpi scanning.
I hope you enjoyed this article.
biline